DIY Essential Oils: A Step-by-Step Guide to Making Your Own at Home
Essential oils have become a cornerstone of holistic wellness, offering numerous benefits for physical, emotional, and spiritual well-being. While store-bought oils are convenient, making your own at home is a rewarding way to ensure the purity and customization of your blends. In this blog, we’ll guide you through the process of crafting your own essential oils, right from the comfort of your kitchen.
Why Make Your Own Essential Oils?
- Purity and Quality: You control the ingredients and methods used.
- Customization: Create blends tailored to your specific needs.
- Cost-Effective: Save money by using ingredients you already have or can grow.
- Sustainability: Reduce waste and support eco-friendly practices.
What You’ll Need
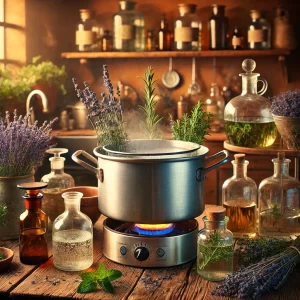
To make essential oils, you’ll use the distillation method, which is the most common and effective technique for home use.
Ingredients
- Fresh or dried plant material (e.g., lavender, mint, rosemary, lemon peels)
- Distilled water
Tools
- A large stockpot with a lid
- A smaller heat-resistant bowl or glass jar
- Ice packs or crushed ice
- A clean, sterilized glass container for storing the oil
- Cheesecloth or a fine mesh strainer
Step-by-Step Instructions
- Prepare Your Plant Material
Harvest fresh herbs, flowers, or citrus peels. Wash them thoroughly to remove any dirt or pesticides. Chop or crush the material slightly to release their natural oils. - Set Up the Distillation System
- Place the small heat-resistant bowl in the center of the stockpot. This bowl will collect the essential oil.
- Add your plant material around the bowl, filling the pot about halfway.
- Pour enough distilled water into the pot to cover the plant material but not overflow the bowl.
- Begin Heating
Cover the pot with its lid upside down. This helps the steam condense and drip into the bowl.- Heat the pot on medium heat until the water starts to simmer. Avoid boiling to prevent burning the plant material.
- Cool and Collect
Place ice packs or crushed ice on top of the inverted lid. This creates a cooling effect, causing the steam to condense back into liquid.- As the water and oil separate during the distillation process, the oil will rise to the top of the collection bowl.
- Strain and Store
After distillation, strain the collected liquid through cheesecloth to remove any plant residue. Transfer the essential oil into a dark glass bottle to preserve its potency.- Store your oil in a cool, dark place to maintain its shelf life.
Tips for Success
- Choose the Right Plants: Some plants yield more oil than others. For example, lavender and mint are excellent for beginners.
- Be Patient: The amount of oil produced can be small, especially with home distillation. Consider it a labor of love!
- Experiment: Mix different plant materials to create unique blends.
Popular DIY Essential Oils
- Lavender Oil: Calming and relaxing, perfect for stress relief.
- Lemon Oil: Uplifting and refreshing, great for cleaning.
- Peppermint Oil: Energizing and cooling, ideal for headaches or muscle tension.
Safety Precautions
- Always test a small amount of essential oil on your skin before use to check for allergies.
- Avoid ingesting homemade essential oils unless guided by a professional.
- Keep essential oils away from pets and children.
Final Thoughts
Making your own essential oils is a deeply satisfying process that connects you with nature and allows you to tailor blends to your specific needs. Whether you’re crafting lavender oil for relaxation or citrus oil to invigorate your senses, DIY essential oils are a beautiful way to enhance your holistic wellness journey.
Have you tried making your own essential oils? Share your experiences and favorite recipes in the comments below!
For more tips on holistic wellness and personalized self-care, explore the offerings at PhillipsRetreat or book a consultation with Tina McAlister, our expert in essential oils and holistic healing.